| Site Map | Contacts | Links | Newsletter | |
Homeschool:
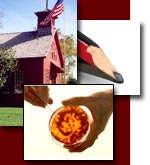
Archaeology Projects
Conduct a dig in your own backyard. Dig down in a certain spot to see what you might find. We dug down in our yard and found old broken bottles, dishes, pottery, marbles, and coal. We made a tripod to hold up a 1/4 inch mess screen to sift the dirt.
- First mark off the square you want to dig with string held by stakes
or large nails in the four corners. The usual size is 5 feet by 5 feet.
Professional archaeologists would then take pictures with a sign showing
the place, date, unit number, and level number. They would make a drawing
showing where the site is located using graph paper, and establish a datum
point for measurements which could be a nail in a fence post, or corner
of a building where you can tie a string.
- Next remove the top layer of grass. Note the color of the soil. Munsells'
Color Soil Chart is the standard used. You may want to save a sample of
the soil in a plastic sandwich bag to test it to see if the soil is acid
or base. Note if the soil is sandy, silt, or clay. Clay is fine grained,
and will soil your hands when you rub it in your fingers.
- Scrape about an inch of the top soil evenly across your site with a trowel. Put the dirt in a bucket and then sift it. Look closely for any artifacts. Put any artifacts in a plastic bag, and mark the unit, and level which would be one. Continue to scrape deeper until you notice a change in the soil color. This is the beginning of Level 2. Note the color of the soil, get a sample, and take some pictures of each new level where there is a change in soil color. Put any artifacts found in this new level in a different bag and mark level 2. With a line level tied to your datum point measure how deep it is at the start of any new level. If you find a bottle of dish measure exactly where it is in the pit. You may want to drawn where it was found on graph paper, and take pictures.
What to Look For
After you sift the dirt look closely for any broken pieces of pottery, glass, coal, and bones. There may even be broken arrowheads, or red cracked fire stones from Indians. Pottery preserves very well. There are a number of kinds of pottery that were made at certain times in the past. Let's look at some of these:
Redware: This is pottery made with red clay like flower pots today. The red color is from iron oxide in the clay. When you find a piece of pottery look at the edge to see what color it is. This tells you what color clay it is made from.
Yellowware: This is pottery made from yellow clay beginning around the 1850'.
Creamware: This is pottery with a cream color. They would take red clay and wash the iron oxide out. A lead glaze would give it a yellowish tint. This started around the 1760'.
Stoneware: This pottery was made from gray clay usually with a lead glaze. Iron oxide was added to give some a purple color. These were fired at higher temperatures.
Pearlware: It has blue color patterns from cobalt that is added to the lead glaze.
Porcelain: Before this century porcelain was made only in China, and it was very expensive. Porcelain is clay heated at very high temperatures so that it turns glass like.